A high-quality video will make you an Instagram star. These are some tips for quality and formats for Instagram videos. Learn how to add subtitles in your video. These tips will help you create an Instagram-worthy video. First, you need to decide what story you want to tell with your Instagram video. Make sure you think about who you want your video to reach. Once you know your target audience, you can write the script. Besides, you should also think of a content strategy, or a topic that will interest your audience. Browse through other creators' videos to find ideas for topics for your Instagram videos. This strategy will help to keep you on track.
Quality is important when creating an instagram video
A compelling Instagram video is a great way for your company to promote it without spending a lot on expensive equipment. It is easy to produce quality videos with just a smartphone equipped with a camera, an editing app and a microphone. Instagram uses video content heavily so make sure you follow the best practices. These are the best ways to create the most captivating video. Also, you should use a video format which is both timeless yet relevant to your audience.
Be sure to upload your video to both Facebook and Instagram. Facebook's algorithm attempts to highlight content that is relevant. Make sure to upload your video directly to Instagram, as well as to other platforms. Facebook also takes into account the actions of users when determining the popularity of a video. Instagram is a powerful platform for selling social media, so it's important to create videos that reflect your personality.

Formats
It is crucial that you choose the right format for your Instagram video uploads. The social network supports several file formats, including MP4 and H.264 video codecs. It also supports AAC audio codescs. Follow these steps to create an Instagram-friendly video. It is important that your video looks its best. Here are some tips for the best Instagram video formats:
Ensure that your video is in an aspect ratio of 1080 x 1920 pixels or higher. GIFs can look great on the platform, however they are not ideal. The format and intended usage of GIFs will impact the aspect ratio. Video content that is intended to be displayed on Instagram's standard Instagram feed should have a 9:16 aspect ratio. A 9:16 aspect should be used if you wish your video to appear on Instagram Stories, Reels, and Carousel ads.
Importing video from your PC
You can upload a video to Instagram from your PC using the video upload function of the app. This is a free service, but the INSSIST Chrome extension can be downloaded to provide additional features such as bulk scheduling, bulk thumbnails, zen mode and custom video thumbnails. This extension allows you to create custom captions for your videos. Google Drive or Dropbox are the most convenient ways to import a YouTube video from your PC to Instagram. This is done by creating an account with Google Drive or Dropbox. Once you have copied the video, you can sync it with Dropbox, then upload it.
To upload a video to Instagram, you do not need a mobile device. Sign in to Instagram. Next, you can click on "Post" in the top-right corner of the homepage. The next page will display a new window that has a video button. You can now choose a cover image for your video.
Subtitles
Instagram allows you to choose from several captioning options when creating a video. You can either import an SRT File, manually type text or generate captions automatically. The captions will be displayed in the left-hand preview when you add them. The captions in the first case will be imported into the video. Once you have added captions, the video preview will allow you to edit them.
Visual cues are another option to caption your video. These can be in the form of stickers, polls, or images. For the sake of accessibility, sound effects may also be used. Closed captions are a great way to help people who are hard of hearing or hard of hearing see what you share. They also make it easier to search engines understand your content. The captions in your video can make your content more accessible to viewers, and this is something that's worth considering.
FAQ
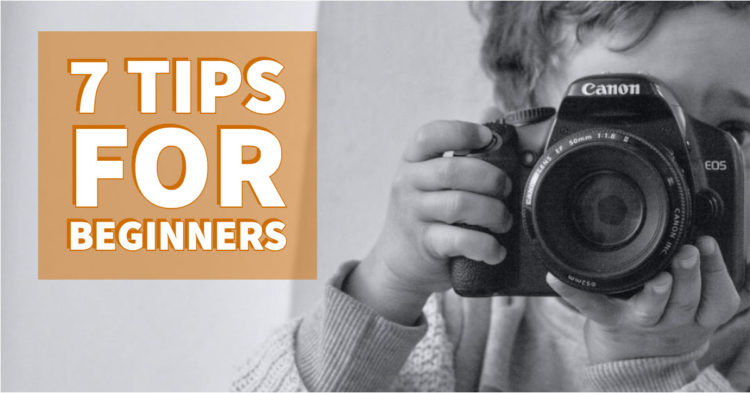
What camera is best for beginners and what are the pros and cons?
The best camera to use for beginners is dependent on your needs, budget, and skill level.
For example, if you're looking to save money, you might choose a point-and-shoot digital camera. These cameras offer good quality but aren't very versatile.
A DSLR (Digital Single Lens Reflex) camera has interchangeable lenses that let you shoot different types of shots. These cameras are generally more expensive that point-and clicks, but provide greater flexibility.
A beginner's package is a great way to get started in photography. Everything you will need, including a tripod, flash, memory cards and lens, can be found in one package.
Don't forget to buy extra batteries too!
Which Lenses Are Best?
Beginners often ask, "What lens should I purchase?" There are many options. It can be difficult to make a decision.
The good news is that you don't necessarily need to buy a new lens every time you purchase a new camera. You can instead add lenses later.
Here are three types you might be interested in.
-
Wide Angle Lens: 14mm - 24mm: These lenses provide a wide angle of vision, which allows you to capture more details of your subject. You can zoom in, but not lose image quality.
-
Normal/Standard Zoom Lens (28mm to 70mm) : These lenses allow you the flexibility of changing focal lengths, while still maintaining high quality images.
-
Telephoto Zoom Lens (70mm - 200mm): These lenses are great for capturing distant subjects. These lenses allow you to focus on your subject, even though they may appear small in the frame.
These lenses can also be combined to produce different effects. For example, you could use a normal lens to shoot close-up details and switch to a telephoto lens to capture far away objects.
How can I improve the quality of my photos on my phone
Great photos don't require expensive equipment! With just a smartphone, you can capture amazing images.
It's easy to get started with the software.
There are many apps that both Android and iOS users can use to edit and share their photos.
If you want to start taking better photos, here are five tips to help you get started.
-
Set Up Your Camera App. Your camera app should already be installed on your device. If not, download it from Google Play or Apple's App Store.
-
Use effects and filters. Effects and filters allow you to alter the appearance of your photos without needing to touch them.
-
Adjust the exposure. You can control the brightness by changing your exposure.
-
Use the Right Lighting Photographing in bright lighting makes it easier for you to see details within your subject. You can capture highlights and shadows in low-light conditions.
-
Take Pictures Of People. It is a great way to share your love with others by taking pictures of them.
To learn more about how to take better photos, check out our article: 5 Tips To Improve Your Photography Skills On A Smartphone.
Statistics
- Get 40% off Adobe Creative Cloud(opens in new tab) (creativebloq.com)
- This article received 13 testimonials, and 100% of readers who voted found it helpful, earning it our reader-approved status. (wikihow.com)
- The second easiest way to get blurry photos 100% of the time is to use a cheap filter on the front of your lens. (photographylife.com)
- In this case, 100% of readers who voted found the article helpful, earning it our reader-approved status. (wikihow.com)
External Links
How To
How to take photos in low light conditions
Low-light photography can be defined as taking photos in dimly lit and dark environments. It requires special equipment. Controlling exposure, white balance, sharpness, and contrast are the main challenges. Low light photography can be divided into two categories: ambient and flash. Flash photography works well when there is sufficient light around you. You will need a flash if you don't have enough natural light. A flash might be necessary if you are photographing a subject indoors and outside. Try shooting at night, during the moonlit hours, if you don't need a flash. You will get beautiful shadows and colors. Another option to consider is shooting during twilight. Twilight happens when the sun has set but there is still daylight.
You may also want to experiment with long exposures. You can record images even after the shutter is closed for several minutes. When the shutter remains closed, the camera records only light that falls on the sensor. The light that falls onto the sensor during a long exposure continues to be recorded. However, because the shutter remained shut, no new light enters the lens. Therefore, there is very little movement. You can ensure clear images by turning off automatic settings such as autofocus or autoexposure. Adjust the ISO setting before you start to shoot. A 200 ISO setting gives you greater control over how dark or bright your image looks. Finally, when you're ready to take the shot, press the shutter button quickly. This will make the shutter close completely. Hold the shutter button down for the final second. You can prevent any additional light entering your camera by holding the shutter button down. Once you have taken your picture, wait for a few moments before you release that shutter button. This allows the camera time to process the photo. While waiting, you can check out your photos on your computer screen. Once you're satisfied with them, save them to your computer.