You must understand the elements of black-and-white photography to make good photographs. These elements are: Light, Contrast. Perspective, and Texture. These four elements are the key to creating stunning images. These elements will allow you to experiment with your photography. You should follow these rules when black and white photography. By following these simple guidelines, you will be on your way to capturing great pictures!
Contrast
There are many ways to improve the contrast between black and white photographs. You can include dark areas in your photo. Sometimes the scene is too dark or bright to include shadows and highlights. However, you can add contrast by using the colors in your scene. For the best contrast, try different lighting options, subjects, and times of day. It is possible to find the setting that suits your personal style.
Light
You need to know how light works if you want black and white photography to be better. Different settings and techniques are required to convert black and white images. Here are some tips to help you get started. First, black and white images offer a higher contrast than those of colors. This contrast creates a unique experience when looking at your final images. Experiment with lighting conditions during the day. Take a photo at different times during the day if possible. This will allow you to experiment with different lighting conditions, and adjust as necessary.
Perspective
Photographers use perspective to tell stories in black and white digital photographs. The perspective that you change when you view an object or scene from a different perspective will affect the composition. It is important that you are able to clearly see your subject's features when photographing from different angles. This will result in a more captivating image. Different lighting combinations can be used to create striking black and white compositions. Here are some tips to help achieve the perfect perspective.
Texture
If you are a fan of the richness and depth of black and brown photography, you might consider using textures in your images. These variations in surface details can add drama and storytelling to your compositions. Digital black and blanc photography can give you beautiful results or frustrate depending on the texture that you wish to capture. Depending upon the subject, you have the option to use either an external flash to direct light onto the subject or an on-camera flash that can lighten small shadows.
Chiaroscuro effect
If you are curious about the Chiaroscuro effect used in black-and-white digital photography, this article will help you. This article will discuss some of the tips you can use to create beautiful images. Let's begin by defining Chiaroscuro. The effect can be achieved in photography by using different light sources to create dramatic contrasts between light and darkness.
Negative space
Negative spaces are a key component in digital black/white photography. They can be used to enhance the overall aesthetics of a picture. A landscape photograph will look its best when there is enough negative space to capture all details. Petecia La Fawnhawk Maggiori recommends using 50 per cent negative space for landscape shots in order to get the desired effect. Negative space photography is a great example of landscape photos that only show one figure.
FAQ
How can I learn how to photograph on my own.
There are many different ways to learn how take great photos. You could buy a book, attend a class, join an online community, watch YouTube tutorials, etc. You can't go wrong with doing it yourself if you are serious about mastering the art of photographing. That way, you have complete control over what goes into each photo. You will continue to learn and improve, so long as you are willing to keep learning.
The best thing about digital photography? You don't need any expensive equipment. All you need to get started is an internet-connected computer and a digital camera. The rest is up for you.
Here are some tips to get you started.
-
Acquaint yourself with the manual settings of your camera.
-
Learn how the basic controls work.
-
Take lots of photographs.
-
Make sure to edit them.
-
Share them.
-
Keep practicing.
-
Experiment.
-
Consider different angles and perspectives.
-
Use light sources creatively.
-
Practice makes perfect.
-
Don't be afraid to fail.
-
Be patient.
-
Have fun
What is the best camera for beginners?
The best camera for beginners will depend on your budget, needs and level of skill.
A point-and-shoot camera is a good option if you want to save money. These cameras are not very versatile but offer excellent quality.
The Digital Single Lens Reflex (Digital DSLR) camera allows you to interchange lenses, allowing you to take different kinds of photos. While they are more expensive than point and shoots, they offer much more flexibility.
A beginner's kit for beginners is a good place to start. Everything you need, including a flash, tripod, memory card and camera body, will be included in the one-pack.
Don't forget to buy extra batteries too!
How can I look good on pictures?
Photographing yourself is the best way to make sure you look professional in your photos. You'll learn the best angles to use, how to pose for photos, and how to make them flattering. You'll also learn lighting techniques and how to use props to enhance natural beauty.
You will learn how to choose clothes that fit, make-up that suits you, and hairstyles and styles that work for your face.
If you're unhappy with the result, we'll show how to retouch your images in Photoshop and other editing programs.
Don't be afraid to take some self-portraits.
Should I get into photography as an interest?
Photography is a wonderful way for you to capture your memories and share them. Photography allows you to see the world from a different perspective.
If you are interested in learning how to take better pictures, there are plenty of resources available online to help you do just that.
You might also consider enrolling in classes at nearby community colleges or art schools. This allows you to meet other photographers who can provide valuable feedback on your work.
What is rule of thirds for photography?
The rule of Thirds allows you to create unique compositions with minimal camera settings. It divides your image in nine equal parts, vertically and horizontally. This divides your image into three areas that you would like to see your subject. These are the top (3rd from the left), middle (3rd from center) and bottom (3rd from lower right). These areas can be used as guidelines for positioning your subject within the frame.
The rule to thirds allows you to avoid placing important elements too closely together or too far apart. They may not be able to create a strong visual impact if they are too close together. They might lose focus if they are too close together.
Light Room can enhance your photos.
The best way to ensure you have the perfect photos for your project is to start early. It's always a good idea to take as many pictures as possible and then decide which ones will be the most valuable.
Lightroom makes this possible by showing you how different settings affect each photograph. These settings can also be modified on-the-fly in Lightroom without ever having to open Photoshop again. This allows you quick experimentation to see what looks best and what doesn’t.
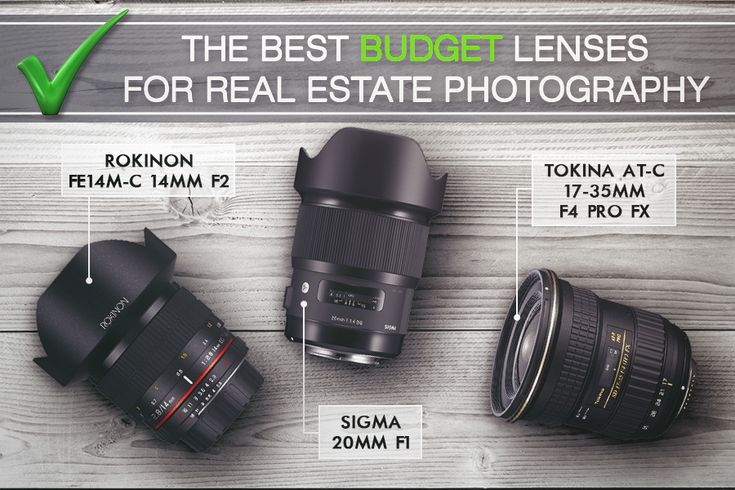
Which Lenses should I Use?
The most frequently asked question by beginners is "What lens should i buy?" This is a difficult decision because there are so many options.
There is good news: You don't need to buy new lenses every time you buy a new camera. You can simply add lenses later.
There are three types possible lenses.
-
Wide Angle Lens (14mm-24mm): These lenses have a wide view angle that will allow you to capture more of your subject. You can also zoom in without losing image quality.
-
Normal/Standard Zoom Lens (28mm - 70mm): These lenses allow you to change focal lengths while maintaining image quality.
-
Telephoto Zoom Lens (70mm, 200mm): These lenses work well for distant subjects. These lenses allow you stay focused on your subject even when they appear small.
Combining lenses can create different effects. For example, you could use a normal lens to shoot close-up details and switch to a telephoto lens to capture far away objects.
Statistics
- In this case, 100% of readers who voted found the article helpful, earning it our reader-approved status. (wikihow.com)
- Get 40% off Adobe Creative Cloud(opens in new tab) (creativebloq.com)
- While I cannot prove that all of those spots were not sensor dust, the photo was taken during a heavy snowstorm…so I guess that 99.8% of the spots are snowflakes. (bhphotovideo.com)
- That's the easiest way to get blurry photos 100% of the time. (photographylife.com)
External Links
How To
How to take photographs in low lighting conditions
Low-light Photography is when you take photos in dimly lit or dark environments. It requires special equipment. The main challenges in this field include controlling exposure, whitebalance, and sharpness. There are two types low-light photography: ambient and flash. Flash photography works best when there is enough lighting around. However, if there's not enough natural light around you, you'll need to use flash. You might need a flash if your subject is outside but indoors. Shooting at night in the moonlight hours is a good alternative to using a flash. This will give you some beautiful shadows and colors. Another option is taking photos at twilight. Twilight occurs when the sun has set, but there is still daylight left.
You may also want to experiment with long exposures. Long exposures enable you to take images even after your shutter has been open for several seconds. The camera records only light falling on the sensor if it is kept closed. This light falls onto the sensor even after a long exposure. The shutter is still closed so no light can enter the lens. Therefore, there is very little movement. To ensure clear images, disable any autofocus and exposure settings. Adjust the ISO setting before you start to shoot. An ISO setting of 200 gives you more flexibility to control how bright or dark your image looks. The shutter button should be pressed quickly when you are ready to take the photo. This will cause the shutter to close completely. Hold the shutter button down for the final second. The shutter button should be held down to prevent more light from entering the camera. Wait a few seconds after you have taken the photo before you release the shutter button. This allows the camera to process the image. While the image is processing, you can see your photos on your computer monitor. Save them once you are satisfied with them.