Here are some tips and tricks to capture stunning sunset shots.
Using a wide-angle lens
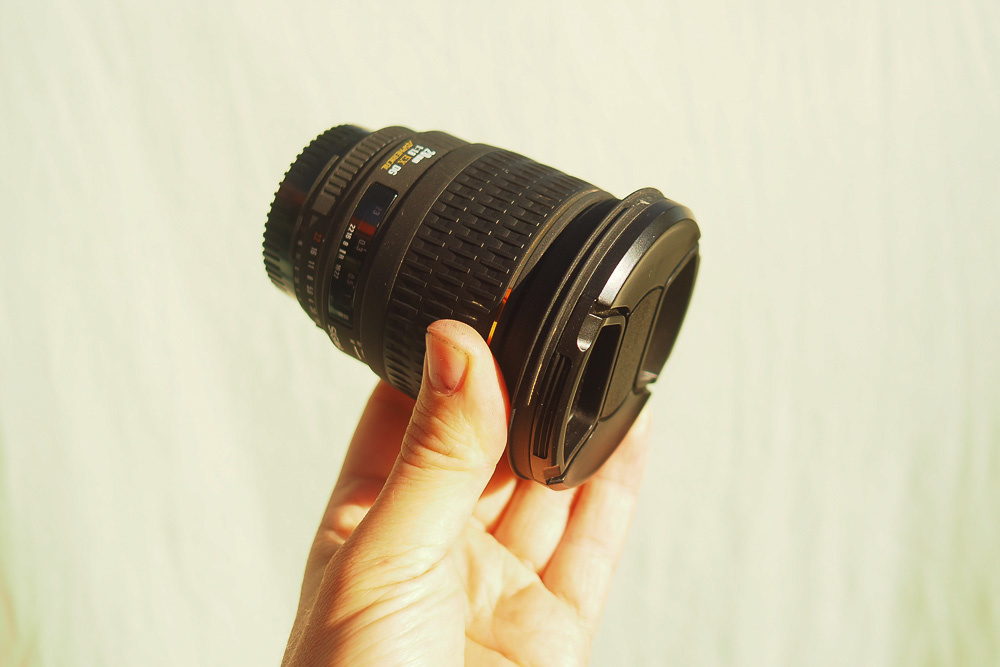
The first thing to know about a wide-angle lens is that it introduces negative space to your photograph. You can show distant mountains and sky with this negative space. However, you don't want the photo to feel empty. You want viewers to enjoy the scene as much you do. Here are some tips to get stunning sunset photos with a wide angle lens.
A wide-angle lens makes distant objects in your photo appear closer than they really are. Cameras can compress the background to create huge ridges which look out of scale. This will give your images an even more dramatic appearance. The wide-angle lenses also allow you to create more negative area, which is the part that does not grab the viewer's attention. You will be able to take the best shots possible as long as you know how wide-angle lenses work.
Use a zoom lens
It's possible to be confused if you should buy a zoom lens or a wide-angle lens if you are new to sunset photography. While a wide-angle lens works well for landscape shots, you should also consider the following factors before purchasing a zoom lens. It will help you capture the sunset from a wider angle, which will be helpful for portraits. Choosing a focal length is important as well.
Using a zoom lens for sunset pictures may be better for getting the reflection on the water. Use a fast shutter speed to capture the moment when using a zoom lens. Also, keep your camera in the correct exposure. Some photographers use an LCD screen to verify exposure. But, this screen's brightness can make it look a lot worse. Correct exposure is essential when shooting Sunset photographs.
ND filters
When you are shooting a sunset, you will want to use a neutral density (ND) filter to prevent overexposure. An ND filters will allow you to achieve motion blur while still allowing for slower shutter speeds. This is especially helpful during the hours immediately before and after sunset, when you have beautiful light and color in the sky. For optimum results, you should use a graduated ND filter on the camera.
An ND filter will darken darker areas of an image and reduce detail. This is opposite to a burned-out, blown-out sky. ND filters are a way to reduce the reflection on water, but still create attractive images. This is also true for night scenes. This filter will also enhance sky colors, especially sunsets.
Composing using a foreground element
Many people make the error of taking pictures at sunset while standing too far from the water or the sand. They don't take advantage of reflections in water which echo the colors of sky, creating a more interesting composition. This sunset picture has an arcing dune border that gives the impression of walking through sand while you view the horizon.
A foreground element can add interest to a photo, as it provides depth. Photographs can look more realistic because they are 2D. One example: A photo of a river can be created by a single tree touching the point. This composition technique is well-suited for wide-angle lens.
FAQ
Cameras available for purchase
There are many places online that you can purchase cameras. We recommend purchasing from a trusted retailer such as B&H Photo Video. They are able to assist you with any questions.
B&H ships quickly and securely to make it easy for you to get your order to your door.
This video will help you learn more about buying cameras.
What can I do to improve my photography skills with my phone?
Amazing photos are possible with minimal equipment. You can take amazing photos with just a phone.
All you need to do is to be able to use the features of the program and to master some basic techniques.
There are many apps that both Android and iOS users can use to edit and share their photos.
Here are five tips for taking better pictures.
-
Set Up Your Camera App. Your camera app should already be installed on your device. If your camera app isn't installed on your device, download it from Google Play.
-
Use Effects & Filters. Effects and filters allow you to alter the appearance of your photos without needing to touch them.
-
Adjust Exposure. Adjusting the exposure can help you control the brightness in your picture.
-
Make sure you are shooting in the right light. Bright light allows you to better see the details of your subject. If you shoot in low light, it is possible to capture shadows or highlights in your photo.
-
Take Pictures of People. You can share the things that you love most by taking photos of others.
You can learn more about how to capture better photos by checking out our article, 5 Tips To Improve Your Photography Skills on a Smartphone
What Camera Should You Get?
It all depends upon what kind of photographer your goal is to become. For beginners, a simple point-and-shoot is the best camera.
You'll probably want something more advanced once you've learned the basics. Personal preference is the only way to decide.
These are some important things to think about before you purchase a new camera.
-
Features: What features do I need? What features do you need? How many megapixels is your camera capable of? Is there an optical viewfinder?
-
Price: How much do you want to spend? Do you plan to update your camera every other year?
-
Brand: Is it possible to be happy with your brand choice? There's no reason why you should settle for less than the best.
-
Functionality: Can your camera work in low-light conditions? Are you capable of taking high-resolution photographs?
-
Image Quality: How clear, sharp, and crisp are your images.
-
Battery Life: How long will your camera last between charges?
-
Accessories: You will be able attach additional lenses, flashes and other accessories. ?
How do I get started with digital photography?
The first thing you should consider when starting out in digital photography is what type of camera you want to use. There are many choices: DSLRs (digital single lens reflex camera), point-and shoot compact cameras and camcorders. Each camera has different benefits and features. DSLR cameras can produce high-quality images, but they are usually heavier and more bulky than other types. Point-and–shoot cameras can be smaller and lighter than DSLR cameras, and they often have automatic settings that allow for special situations. Camcorders offer excellent video recording capabilities, and may also have still photo shooting modes. Smartphones are light and portable and can be carried around easily.
Once you've chosen the type of camera that you want, you can decide whether to purchase a used or new model. Used cameras can be found at reasonable prices, especially if they were purchased within the last few years. Because manufacturers invest large sums of money in developing new technology, new models tend to be more expensive.
Next, purchase lenses. The quality of your photos is directly affected by the lens. They allow you to control the lens's focal length, allowing you to zoom into the scene without losing focus. Some lenses are equipped with flash units built in, while others require external flash units. There are many brands offering a variety of lenses. Each brand has their own distinctive characteristics.
Finally, you will need to invest in memory cards. Memory cards can store pictures that were taken with your digital camera. Your card's size will determine how many pictures it can store. Multiple memory cards are required if you intend to take many pictures.
Light Room can enhance your photos.
It is important to begin early in order to have great photos. It is always better to take as many photos as you can and then choose the best.
This is possible because Lightroom lets you see how different settings affect each image. You can also adjust these settings on-the-fly without going back into Photoshop. This allows you to quickly test what looks great and what does not.
Which Lenses Should I Use?
Most beginners will ask this question: "Which lens should I buy?" Because there are so many options, it can be difficult to choose.
You don't have to buy a brand new lens each time you purchase a new camera. You can always add lenses later.
Here are three types of lenses to start with.
-
Wide Angle Lens: 14mm - 24mm: These lenses provide a wide angle of vision, which allows you to capture more details of your subject. You can zoom in to improve image quality.
-
Standard/Normal Zoom Lens (28mm – 70mm): These lenses allow for you to adjust focal lengths and maintain image quality.
-
Telephoto Zoom Lens (70mm–200mm) : These lenses are ideal for photographing distant subjects. These lenses allow you to focus on your subject, even though they may appear small in the frame.
You can also combine these lenses to create different effects. One example is to use a regular lens to photograph close-up details and then switch to a long-range lens to capture faraway objects.
Is photography a talent?
Photography is not a skill, but an art form. This requires years of practice, training, and experiences. To master any aspect of photography, it takes years of practice and study.
Photography is also a business where you need to have a plan for how you are going to make money from it.
This requires you to identify the type of client you are trying to attract and to find out how to reach them.
You must know their identity and what they want. You need to be able communicate clearly and persuasively in order to persuade your clients to purchase your services.
This means that you will need to be well-organized and prepared when you meet potential clients.
You will need to have a portfolio of work before you can approach potential customers. This can be done electronically using software programs or printed on paper.
After you have built a portfolio, it is time to look for ways to showcase it. This could mean approaching businesses directly or advertising online.
Statistics
- In this case, 100% of readers who voted found the article helpful, earning it our reader-approved status. (wikihow.com)
- There are people out there who will pick at flaws they can only see in 100% crops of your photos. (wikihow.com)
- This article received 13 testimonials, and 100% of readers who voted found it helpful, earning it our reader-approved status. (wikihow.com)
- That's the easiest way to get blurry photos 100% of the time. (photographylife.com)
External Links
How To
How to take macro shots with photography
Macro photography is the ability to capture small objects, such as insects and flowers, at close range. Macro is a Greek term that means large. You can capture close-up shots with a lens that has a focal length of more than 50mm.
A macro lens with a good working distance should be able to capture sharp images even when you are not moving too much. You also want to avoid movement while taking photos because anything that moves during exposure could blur your image.
Here are some ways to get great macro photos
-
Use a tripod. You can use a tripod if you don't own one. You'll be less likely to move while you shoot.
-
Make sure you choose the right lighting. Macro lenses usually come with built in light filters. But if you don’t, you can always buy one. It helps to avoid overexposure.
-
Be patient! Shooting macros takes practice. Even though you might only see one tiny bug or flower at a time, it is worthwhile to continue shooting until you capture it.
-
RAW format is best. RAW files are more detailed than standard JPEGs and contain more data. RAW files are better for editing later as you can make adjustments such as cropping and colour correction.
-
Don't forget the background. Sometimes the background can add interest to your shot, even if you have a great foreground object. It's worth including it in your photograph.
-
Keep learning.